

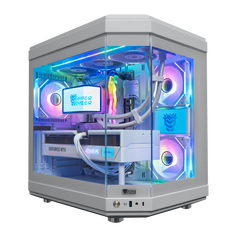


Your PC needs enough power to handle a multi-screen setup without choking. The GPU is the heart of this operation, especially in modern builds like those based on NVIDIA gaming systems. Check the back of your case to see what ports you have available. You typically find a mix of HDMI, DisplayPort, and occasionally USB-C.
For the main gaming monitor, DisplayPort is usually the best bet. It handles high bandwidths much better than older standards, allowing for the high refresh rates you want.
HDMI serves well for the second display, where speed matters less. Ideally, use the same connection type for both displays to keep the visual output consistent.
If your GPU ports don't match your monitor inputs, you have to use an adapter. Active adapter units are worth the extra money because they convert the signal reliably. Never underestimate the cable quality either. A cheap cable often fails to carry the full signal, leading to black screens or artifacts.
Connecting your displays to the computer
The physical installation process is straightforward but requires attention to detail. Start by plugging your main gaming monitor into the primary slot on your graphics card. This should be the port with the highest specification, usually the first DisplayPort slot. Connect the secondary screen to the next available port. Secure each cable firmly. A loose connection can cause intermittent signal loss during gameplay.
Power on both units before turning on your PC. Your operating system should detect the new hardware immediately. You might see the same image on both screens initially. This means the system is in "duplicate" mode. You will change this in the settings later. We always advise plugging the main display directly into the GPU rather than through a dock or splitter. Direct connections reduce latency.
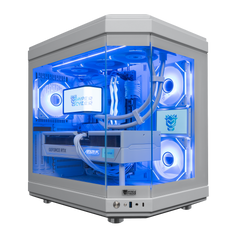
Specific graphics card manufacturers offer their own software for managing a multi screen environment. Nvidia Control Panel and AMD Software: Adrenalin Edition provide advanced options, and both work reliably on setups powered by AMD Radeon gaming PCs or Intel-based GPU systems. You should update your GPU driver to the latest version immediately. A rigid driver update schedule prevents compatibility issues. These proprietary tools often allow for more granular control over color and performance than the standard Windows settings.
Configuring system settings for an extended workspace
Windows handles multi-screen arrays well, but it rarely gets the settings right on the first try. You usually start with a mirrored image, which isn't useful for gaming. Right-click your desktop and open "Display settings" to see the numbered diagram of your layout. If you aren't sure which screen is which, hitting the "Identify" button flashes a number on each panel. From here, you need to tweak a few specific options to get the desktop flowing correctly across your setup:
- Switch the behavior from "Duplicate" to "Extend these displays" so you have one large workspace instead of two identical images.
- Select the rectangle representing your high-spec gaming monitor and check "Make this my main display" to force games to launch there.
- Drag the rectangles in the diagram to match the physical alignment on your desk, ensuring the mouse moves naturally between them.
- Verify that the resolution matches the native specs of the panel (like 1920x1080 or 2560x1440) for the sharpest picture.
Once the layout looks right, take a quick look at the scaling settings. Windows loves to crank this up to 150% on high-res screens, which makes text readable but can mess up game menus. We suggest keeping the scaling at 100% whenever possible to avoid blurry interfaces. If you mix a 4K display with a standard 1080p unit, you might see window sizing weirdness, but keeping the settings native usually minimizes the headache.
Harmonizing refresh rates and visual profiles
A major advantage of a gaming-focused setup is smooth motion. You must manually configure the hertz output for your screens. Windows often defaults to 60 Hz even if you bought a 144Hz panel. Go to "Advanced display settings" in the Windows menu. Select your main monitor from the dropdown list. Look for the refresh rate option and set it to the maximum available value. Repeat this for the secondary display.
Different screens often use different technologies. Your main unit might be a fast TN or IPS panel, while your secondary one is a VA panel. A mismatch in panel types leads to color discrepancies. One screen might look warmer or more saturated than the other. You can adjust the brightness and contrast using the physical buttons on the bezel. Try to match the white point on both displays visually.
More advanced users should install a specific color profile for each device. Manufacturers frequently provide these files on their websites. A correct profile tells Windows how to render colors accurately on that specific hardware. We also recommend disabling HDR on the secondary screen if it does not support high peak brightness. Poor HDR implementation can make the desktop look washed out. Consistent color settings reduce eye strain during long sessions.
Game settings and cursor management
Games behave differently in a dual-monitor environment. The most common annoyance is the mouse cursor drifting out of the game window and clicking on the second screen. This minimizes the game instantly. You can prevent this by checking the display mode in the game's video settings. Avoid "Windowed" mode if you want to keep the mouse locked.
"Fullscreen" mode gives the application exclusive control over the display. This usually offers the best performance and prevents accidental clicks on the other monitor. However, switching to the second screen to check Discord or a guide takes longer. "Windowed Borderless" or "Borderless Fullscreen" is a popular middle ground. It allows instant mouse travel between screens when you open a menu or pause the game. Note that this mode forces the game to use the Windows desktop composition, which might introduce slight input lag.
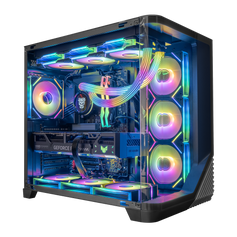
Some simulation titles support ultra-wide views across multi-monitor configurations. You will need to adjust the FOV (field of view) settings drastically to make this look correct. A high FOV prevents the image from looking stretched on the side panels. Always check if the game engine supports a multi-screen resolution natively, especially if your setup is part of a broader workstation like our Streaming PC systems.
Ergonomics and physical layout optimization
How you arrange your desk matters more than you think. Bad ergonomics will ruin your gaming session with neck pain quicker than a lag spike. You want a setup that feels natural, where you don't have to twist your head constantly. Getting the physical layout right involves a few key adjustments to keep everything within easy view:
- Position the primary monitor directly in front of you so your eyes are level with the top third of the panel.
- Angle the secondary display inward to create a curved "cockpit" effect for better immersion.
- Check if your screens support a VESA bolt pattern and swap the bulky stands for a desk mount.
- Use a dual-arm mount to reclaim desk space for your mousepad and keyboard.
- Some users prefer rotating the second screen vertically. This "portrait" mode is perfect for reading chat streams or long documents. You can switch this easily in the display settings, but remember to double-check the alignment afterward so the mouse moves across correctly. Finally, use Velcro ties to strap the cables against the arm. Loose wires look messy and can pull tight when you adjust the screen position.
Solving common technical problems
Issues can arise even in a perfectly planned setup. A sudden black screen usually indicates a cable or bandwidth problem. Try swapping the HDMI or DisplayPort cable with a known working one. If the screen flickers, check if the cable is running too close to power lines. Electromagnetic interference can disrupt the signal.
Sometimes Windows "forgets" your window positions after sleep mode. This is often a driver quirk. Updating your GPU driver usually fixes this. If your refresh rate keeps resetting to 60 Hz, verify that your adapter supports high bandwidth. Many cheap adapters are limited to 60 hertz.
Blurry text on one screen often points to a resolution or scaling mismatch. Verify that both screens are running at their native pixel count. If the colors still look wrong despite calibration, reset the monitor to factory settings via the on-screen menu. Then apply your brightness and color adjustments again.
Final checks for your system
We recommend a final walkthrough of your configuration. Verify that your USB-C devices are charging if connected to the monitor. Check that the VESA screws are tight. Ensure the profile for color management is active. A stable dual monitor configuration changes the way you play and work. Enjoy the expanded digital workspace — whether you’re gaming on a setup built around AMD gaming hardware or running productivity workloads on Intel-powered PCs.


